🔍 What is Nginx Proxy Manager?
Nginx Proxy Manager (NPM) is an open-source web proxy management tool based on Nginx that allows you to manage complex reverse proxy settings with a simple web UI.
- Main purpose: HTTPS reverse proxy for multiple domains/services, automate SSL certificate issuance/renewal
- Benefits: Can be deployed in 5 minutes based on Docker containers without CLI commands ⚡️
—.
✨ Core Features
-
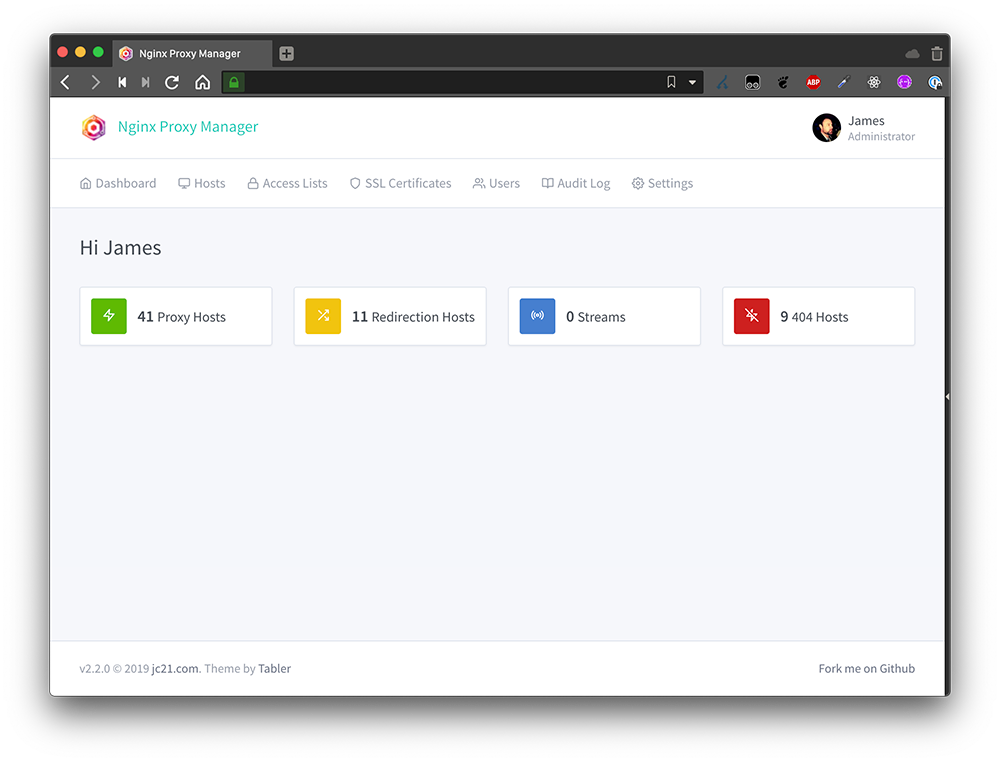
Intuitive web dashboard.
- Manage proxy hosts, SSL, access control visualization
 (Source: official documentation).
- Manage proxy hosts, SSL, access control visualization
-
Let’s Encrypt integration.
- Issue/automatically renew SSL certificates with one click 🔒.
graph LR
A[Enter domain] --> B[Select Let's Encrypt]
B --> C [Register email]
C --> D[Apply HTTPS automatically]
- Issue/automatically renew SSL certificates with one click 🔒.
-
Advanced proxy features.
- Custom location settings (e.g.
your.com/blog→ WordPress server) - Websockets, HTTP/2 support
- IP-based access control (white/blacklist)
- Custom location settings (e.g.
—.
🛠 Installation Guide (based on Docker)
**Prerequisite: Docker, Docker Compose installed
-
Create
docker-compose.ymlfile:version: '3' services: app: image: 'jc21/nginx-proxy-manager:latest' ports: - '80:80' - '443:443' - '81:81' # management ports volumes: - ./data:/data - ./letsencrypt:/etc/letsencrypt -
run the service:
docker-compose up -d -
connect to:
http://서버IP:81- Initial login:
admin@example.com/changeme
- Initial login:
—]
⚙️ Follow the default settings
📌 Add a proxy host
- Hosts → Proxy Hosts → Add Proxy Host
- Required fields:
- Domain Names:
your-domain.com - Scheme:
httporhttps - Forward Hostname/IP:
Internal Server IP(for example,192.168.1.100) - Forward Port:
8080
- Domain Names:
🔐 Apply SSL
- click SSL tab → select Let’s Encrypt.
- enter your email → Save → Certificate is automatically issued and HTTPS enforcement is enabled!
🛡️ Access control (e.g. limit admin pages)
- go to Access Lists → Add Access List
- Set enforcement rules:
- Satisfy any: All must pass.
- Add rule:
IP Address=UserIP(enter the allowed IP)
- edit proxy host → select the rule you created in the Access List tab
—.
🧰 Advanced Utilization Tips
🔄 Multi-Application Integration.
- Path-based routing**:
service1.your.com→ ServerA:3000service2.your.com/blog→ ServerB:8080
📊 Monitoring setup
Prometheus + Grafana integration:
# add docker-compose.yml
environment:
  ENABLE_METRICS: 'true' # Exposing data to http://npm:81/metrics.
🚨 Check live logs
docker logs -f [containerID] # Required in case of errors!—]
❌ Troubleshooting typical issues
-
502 Bad Gateway
- Verify that the target server is running:
curl http://내부서버IP:포트 - Check firewall:
ufw allow 8080(on Ubuntu)
- Verify that the target server is running:
-
**SSL certificate renewal failed
- Make sure port 80/443 is open (requires Let’s Encrypt authentication)
- Volume permissions:
chown -R 1000:1000 ./letsencrypt
-
Domain not reachable Check DNS settings
- Check DNS settings:
dig your-domain.com - Test hosts file: add
serverIP your-domain.comlocally
- Check DNS settings:
—]
✅ Conclusion: Why NPM?
| Traditional Nginx | Nginx Proxy Manager | Nginx Proxy Manager |
|---|---|---|
| Complex CLI setup | Few clicks in web UI ✨ | |
| Manual Certificate Renewal | Automatic Renewal ⚡️ | |
| Advanced setup difficult | 10 minutes for beginners 🚀 |
> 💡 Suitable users: > – Home lab/small service operators. > – Need a lighter solution than Kubernetes Ingress > – Don’t want to waste time on SSL, domain management!
**Get started with one line of Docker commands right now!
mkdir npm && cd npm && nano docker-compose.yml # Paste the above configuration and run!